Air fryers have become indispensable kitchen companions, making crispy, delicious meals with minimal oil. But as you enjoy perfectly cooked wings and fries, consider the tools you use to clean your prized appliance: your sponges and brushes. Are they truly clean, or are they harboring unseen guests? Just as vital as cleaning your air fryer is ensuring your cleaning tools themselves are sanitized to prevent the spread of bacteria and maintain a truly hygienic kitchen. This comprehensive guide will walk you through the most effective methods to sanitize your air fryer sponges and brushes, ensuring your cleaning efforts are always productive and safe.
Understanding the Need for Sanitization
It’s easy to overlook the cleanliness of cleaning tools. After all, they’re used with soap and water, right? Unfortunately, sponges and brushes, especially those used to tackle greasy air fryer residue, are prime breeding grounds for bacteria, mold, and yeast. The warm, damp environment, coupled with food particles and grease, creates an ideal habitat for microbes to flourish. Using unsanitized tools can negate your cleaning efforts, potentially spreading harmful bacteria like E. coli or Salmonella onto your “clean” surfaces, increasing the risk of foodborne illness. Regular sanitization is a crucial step in maintaining overall kitchen hygiene and extending the effective lifespan of your cleaning tools.
Essential Pre-Sanitization Steps
Before you even think about sanitizing your air fryer sponges and brushes, a thorough pre-cleaning is essential. Sanitization is most effective on tools that are already free of visible food debris and grease.
First, rinse your sponge or brush under hot running water to dislodge any loose food particles. For brushes, use your fingers to gently work through the bristles, ensuring no crumbs or oily residue remain trapped. For sponges, squeeze them repeatedly under the water. Next, apply a good amount of dish soap and scrub the tools against each other or your hands to create a lather. This helps break down stubborn grease and food residue that might be clinging to the fibers or bristles. Rinse thoroughly until the water runs clear and no suds remain. This initial cleaning prepares your tools for the sanitization process, allowing the chosen method to work more effectively against microorganisms.
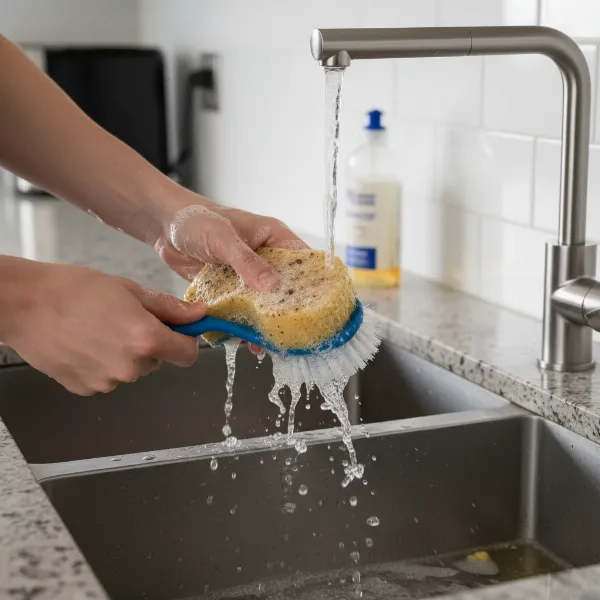 Hands rinsing a kitchen sponge and brush under hot running water with soap bubbles.
Effective Methods for Sanitizing Air Fryer Sponges
Sanitizing your air fryer sponges is critical for preventing cross-contamination and ensuring a truly clean cooking environment. Here are several highly effective methods:
The Microwave Method
Microwaving is a popular and highly effective way to sanitize sponges. Studies by the USDA have shown this method can eliminate up to 99.99999% of bacteria.
- Instructions: First, ensure your sponge is completely saturated with water; a dry sponge can catch fire in the microwave. Place the wet sponge on a microwave-safe plate or bowl. Microwave on high for 1 to 2 minutes. After microwaving, allow the sponge to cool in the microwave for 10-15 minutes before carefully removing it, as it will be extremely hot.
- Pros: This method is quick and incredibly effective at killing a broad spectrum of bacteria.
- Cons/Warnings: Do not use this method for sponges containing metallic scrub pads, as metal can cause sparks and fire in a microwave. Always ensure the sponge is thoroughly wet.
|
Our Picks for the Best Air fryer in 2026
As an Amazon Associate I earn from qualifying purchases.
|
||
| Num | Product | Action |
|---|---|---|
| 1 | Chefman TurboX 4-in-1 Air Fryer, 5-Quart Airfryer for Extra Crispy Chicken, Fries, Wings, and More, Air Fry, Bake, Reheat, and Frozen Functions, Digital Touch Controls, Dishwasher Safe |

|
| 2 | bella 4Qt Slim Air Fryer, Fits-anywhere™ Kitchenware, EverGood™ Ceramic Nonstick Coating, Adjustable Temperature, 6 Preset Cooking Options, 60 Min Auto Shutoff w Audible Tone, 3.3lb Capacity, Oatmilk |
|
| 3 | Cuisinart Air Fryer Toaster Oven, 1800W, 8-in-1 with Air Fry, Convection, Broil & Warm, 0.6 Cubic Feet, 60-Minute Timer, TOA-70NAS, Stainless Steel |
|
| 4 | Cosori 9-in-1 TurboBlaze Air Fryer 6 Qt, Premium Ceramic Coating, 90°–450°F, Precise Heating for Even Results, Air Fry, Roast, Bake, Broil, Dry, Frozen, Proof, Reheat, Keep Warm, 120V, Dark Gray |
|
| 5 | Ninja - Air Fryer - 4 QT Capacity - 4-in1 Roast, Crisp, Roast, Reheats, & Dehydrates - Dishwasher Safe Parts - Includes 20 Easy & Healthy Recipes - Compact - Grey - AF101 |
|
| 6 | Chefman Air Fryer – 6 QT Compact Airfryer for Quick & Easy Meals in Minutes, Features Hi-Fry Technology for Extra Crisp, Touchscreen Controls with 4 Presets, Nonstick & Dishwasher Safe Basket - Black |
|
| 7 | Ninja Crispi Pro 6-in-1 Glass Air Fryer - 450°F, Nontoxic, 6qt & 2.5qt Containers & Lids - Microwave, Freezer, Dishwasher Safe - Max Crisp, Air Fry, Bake, Roast, Recrisp, Dehydrate -Cyberspace AS101CY |
|
| 8 | Ninja - Air Fryer - 4-in-1 Pro Air Fry, Roast, Reheat, Dehydrate - 5QT Capacity fits up to 4lbs of French Fries - 400F Max Temp - Nonstick Basket & Crisper Plate - 120V - Grey - AF141 |
|
| 9 | Ninja - XL Single Basket Air Fryer - 5.5 QT Capacity fits 3lbs of Wings - 5-in-1Air Fry, Roast, Bake,Reheat & Dehydrate -Dishwasher Safe Parts & Recipe Guide - Grey -AF150AMZ |
|
| 10 | Ninja Air Fryer, 8 QT DoubleStack 2-Basket, Space Saving Design, Cooks 2lb Chicken Wings, Feeds up to 6 People, 6-in1 Air Fryer, Roast, Bake & More, Easy to Clean, Dishwasher Safe Parts, Black, SL201 |
|
The Dishwasher Method
Your dishwasher isn’t just for dishes; it’s also excellent for sanitizing sponges, especially those with metallic components.
- Instructions: Place your air fryer sponge on the top rack of your dishwasher. Run the dishwasher on the hottest and longest cycle available, ideally with a heated dry setting. The high temperatures of both the wash and dry cycles are effective at killing germs.
- Pros: This method is convenient as it runs alongside your regular dishes and is suitable for sponges with metallic elements that cannot be microwaved. It eliminates up to 99.9998% of microbes.
- Cons: It requires a full dishwasher cycle, which might be less frequent than your need to sanitize.
Boiling Water Immersion
Boiling water is a simple, chemical-free way to sanitize sponges, favored by some experts for its effectiveness.
- Instructions: Bring a pot of water to a rolling boil. Carefully submerge your pre-cleaned sponge in the boiling water for at least 60 seconds (1 minute). Use tongs to remove the hot sponge and allow it to cool completely before handling.
- Pros: This is a highly effective, chemical-free method that reliably kills most bacteria and viruses.
- Cons: Requires direct handling of hot water and the sponge itself.
Bleach Solution Soak
For a powerful chemical approach, a bleach solution can quickly sanitize your sponges.
- Instructions: In a basin or sink, prepare a sanitizing solution by mixing 1/4 to 1/2 teaspoon of concentrated chlorine bleach (8.25% hypochlorite) per quart of WARM (not hot) water. Submerge the pre-cleaned sponge in this solution for one minute. After soaking, thoroughly rinse the sponge under running water until the smell of bleach is gone.
- Pros: Bleach is a potent disinfectant, effective against a wide range of pathogens.
- Cons: Requires careful handling of chemicals, can discolor certain sponges, and a strong bleach odor may linger if not rinsed well.
Effective Methods for Sanitizing Air Fryer Brushes
Air fryer brushes can accumulate grease and food particles, making sanitization just as important as for sponges.
Vinegar and Dish Soap Soak
This method offers a natural and gentle yet effective way to sanitize most kitchen brushes.
- Instructions: After thoroughly rinsing your brush, fill a cup or small dishpan with distilled white vinegar. Add a drop of dishwashing liquid. Submerge the bristle-end of your air fryer brush into the solution, ensuring the bristles are fully immersed. Let it soak for at least one hour. After soaking, rinse the brush thoroughly in warm water, shake off excess water, and allow it to air-dry completely.
- Pros: Vinegar is a natural disinfectant and deodorizer, making this a great option for brushes where you prefer to avoid harsh chemicals. It’s also gentle on bristles.
- Cons: While effective, it may not be as potent against all microbes as bleach or high heat methods.
Dishwasher Cleaning
Many air fryer brushes are designed to be dishwasher safe, offering a convenient sanitization option.
- Instructions: After rinsing off any food debris, place your air fryer brush on the top rack of the dishwasher. Ensure it’s secure and won’t fall through the grates. Run the dishwasher on a hot, long cycle with a heated dry option.
- Pros: This is a very convenient method, leveraging the high temperatures and powerful detergents of your dishwasher.
- Cons: Always check the manufacturer’s instructions for your specific brush. Some brushes, especially those with wooden handles or natural bristles, may not be dishwasher safe and could be damaged or warp.
Boiling Water Sanitization
Similar to sponges, boiling water can be an excellent way to sanitize your air fryer brushes, particularly those with synthetic bristles.
- Instructions: Bring a pot of water to a boil. Carefully immerse the bristles of your pre-cleaned air fryer brush into the boiling water for at least 60 seconds. If the entire brush is made of heat-resistant material (like silicone or certain plastics), you can submerge the whole brush. Use tongs to remove and let it cool before handling.
- Pros: This method is chemical-free and highly effective at killing bacteria.
- Cons: You must be mindful of the brush’s material; prolonged exposure to boiling water can melt or warp certain plastics or damage wooden handles.
Bleach Solution (if material compatible)
For brushes made of durable, bleach-safe materials, a diluted bleach solution can provide powerful sanitization.
- Instructions: Follow the same bleach solution preparation as for sponges: 1/4 to 1/2 teaspoon of concentrated chlorine bleach (8.25% hypochlorite) per quart of WARM water. Submerge the brush (or just the bristles if the handle is incompatible) for one minute. Rinse thoroughly with clean water afterward to remove all bleach residue.
- Pros: Provides a high level of disinfection.
- Cons: Always verify that your brush material is bleach-safe to avoid discoloration, damage, or degradation. Wear gloves when handling bleach.
Best Practices for Maintaining Air Fryer Cleaning Tools
Beyond regular sanitization, adopting good habits for tool maintenance can significantly boost your kitchen hygiene.
Frequency of Sanitization and Replacement
Consistency is key. Aim to rinse your air fryer sponge and brush thoroughly with hot water and dish soap after every use. For sanitization, sponges should ideally be sanitized daily or at least every other day, especially if used frequently. Brushes can typically be sanitized weekly or after particularly greasy air fryer cleaning sessions. More importantly, establish a replacement schedule:
- Sponges: Replace every 1 to 2 weeks, or immediately if they start to smell musty or show signs of deterioration. A foul odor is a clear indicator of bacterial growth, even if recently sanitized.
- Brushes: Replace when bristles become matted, frayed, or if the brush develops an unpleasant odor that won’t dissipate with sanitization.
Proper Drying Techniques
After cleaning and sanitizing, how you dry your tools is just as crucial. A damp environment encourages bacterial growth. Always allow your sponges and brushes to air dry completely between uses and after sanitization.
- Sponges: Squeeze out as much water as possible and stand them upright in a well-ventilated area or in a sponge holder that allows for airflow around all sides.
- Brushes: Shake off excess water and stand them bristle-side up in a container or hang them to allow air to circulate freely around the bristles.
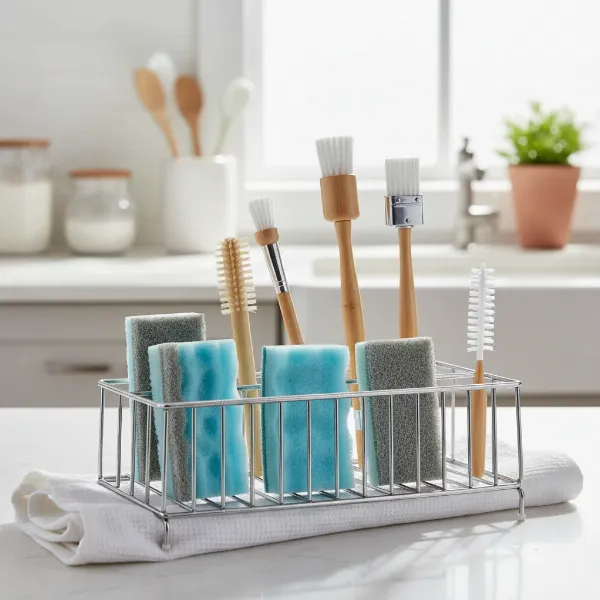 Clean, sanitized air fryer sponges and brushes air-drying on a rack in a kitchen.
Choosing the Right Cleaning Tools for Your Air Fryer
Selecting appropriate tools can also aid in easier cleaning and sanitization.
- Soft Sponges/Brushes: Always opt for non-abrasive sponges and brushes to protect the non-stick coating of your air fryer basket and accessories. Silicone brushes are excellent as they resist heat and odors and are often dishwasher safe.
- Dedicated Tools: It’s a best practice to have a sponge and brush specifically designated for cleaning your air fryer. This prevents the transfer of bacteria from other kitchen items (like raw meat prep surfaces) to your air fryer, reducing the risk of cross-contamination.
Common Mistakes to Avoid
Even with the best intentions, some common errors can compromise your cleaning and sanitization efforts.
- Not rinsing thoroughly before sanitizing: Leaving food particles or grease on your tools before sanitizing can shield bacteria from the sanitizing agent, rendering the process less effective.
- Microwaving dry or metallic sponges: This is a significant fire hazard and must be avoided. Always ensure sponges are saturated with water and free of metal before microwaving.
- Using harsh chemicals on incompatible materials: Bleach can be powerful, but it can also damage or discolor certain plastics, wood, or natural fibers. Always check material compatibility.
- Neglecting to replace old, smelly tools: No amount of sanitization can save a sponge or brush that has reached the end of its useful life. An odor is a sign that it’s time for a replacement.
By understanding these pitfalls, you can ensure your sanitization routine is consistently effective and safe.
Conclusion
Maintaining a clean air fryer goes beyond just wiping down the basket; it extends to the very tools you use for cleaning. By consistently sanitizing your air fryer sponges and brushes using methods like microwaving, dishwashing, boiling, or bleach solutions, you actively prevent the spread of harmful bacteria and ensure a hygienic kitchen environment. Remember to pre-clean diligently, allow tools to dry completely, and replace them regularly. Embracing these practices not only safeguards your family’s health but also contributes to the longevity and efficiency of your beloved air fryer. What’s your go-to method for keeping your air fryer cleaning tools pristine?
Frequently Asked Questions
Can I sanitize my air fryer sponge with just hot tap water?
No, hot tap water alone is generally not hot enough to effectively kill most bacteria and viruses lurking in sponges. For effective sanitization, you need to use methods that reach higher temperatures or introduce disinfectants, such as boiling water, microwaving, or a bleach solution.
How often should I sanitize my air fryer brush?
It’s recommended to sanitize your air fryer brush at least once a week, especially after heavy use or when cleaning particularly greasy components. Daily rinsing with hot, soapy water after each use is also crucial to prevent buildup.
Is it safe to put my air fryer cleaning brush in the dishwasher?
Most modern air fryer cleaning brushes, particularly those made of silicone or durable plastics, are dishwasher safe. Always check the manufacturer’s instructions for your specific brush to ensure it won’t be damaged by the high heat and detergents of a dishwasher cycle.
What if my sponge smells even after sanitizing it?
If your sponge still has a lingering odor after being thoroughly sanitized, it’s a clear indication that bacteria have deeply infiltrated its structure, and it’s time to replace it. An odor means the sanitization method wasn’t fully effective, or the sponge is simply too old.
Can I use the same sponge/brush for the air fryer and other dishes?
While technically possible, it is not recommended for optimal kitchen hygiene. It’s best practice to use dedicated cleaning tools for your air fryer to prevent potential cross-contamination, especially if you clean up raw meat residue from your air fryer basket.